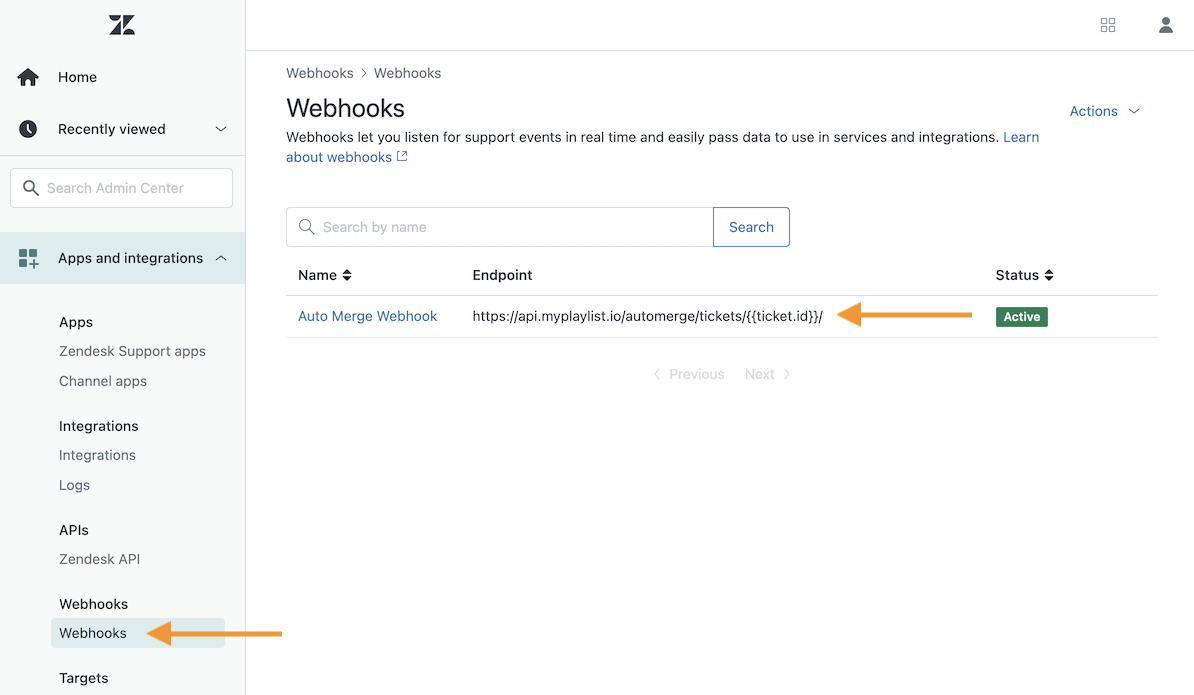
An Auto Merge Webhook is automatically created for you when you authorize the app. Once you have configured your auto merging rules, the final step is to create a Zendesk trigger to notify the Auto Merge Webhook. Without this trigger, Auto Merge will not take any action.
Auto Merge Webhook
You should see the Auto Merge Webhook in the Zendesk Admin Center. If you installed the app before October 14, 2021, make sure you have converted your HTTP targets to webhooks. HTTP targets have been deprecated by Zendesk.
If you still don't see the webhook, please contact us.

Create a trigger to notify active webhook
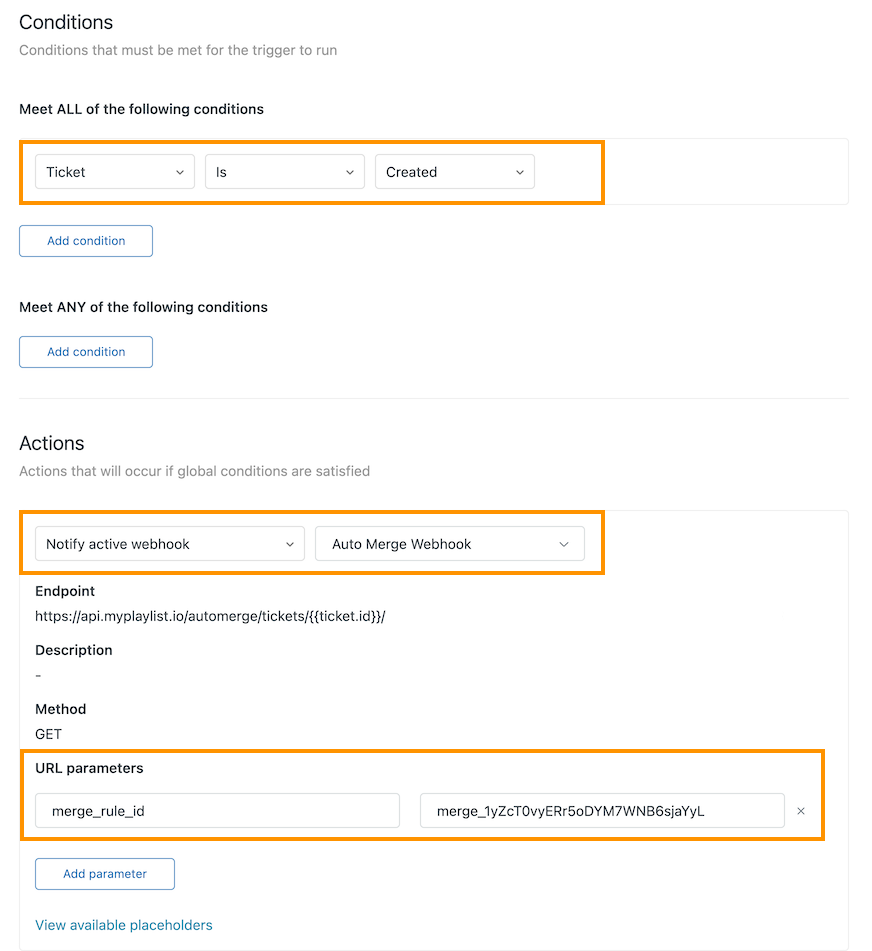
Below is a basic trigger to help you get started. Of course, you'll want to customize it for your specific use cases.
Trigger name: Auto Merge Trigger
Conditions (Meet ALL):
- Ticket > Is > Created
Actions:
- Notify active webhook > Auto Merge Webhook (may also appear as Auto Merge Target for some accounts)
- URL parameters
- key = merge_rule_id
- value = {YOUR RULE ID}
- URL parameters

Make sure you reference your rule ID by adding a merge_rule_id URL parameter. Enter merge_rule_id for "key" and paste your Rule ID for "value". This will tell the Auto Merge service exactly which rule to use for merging.
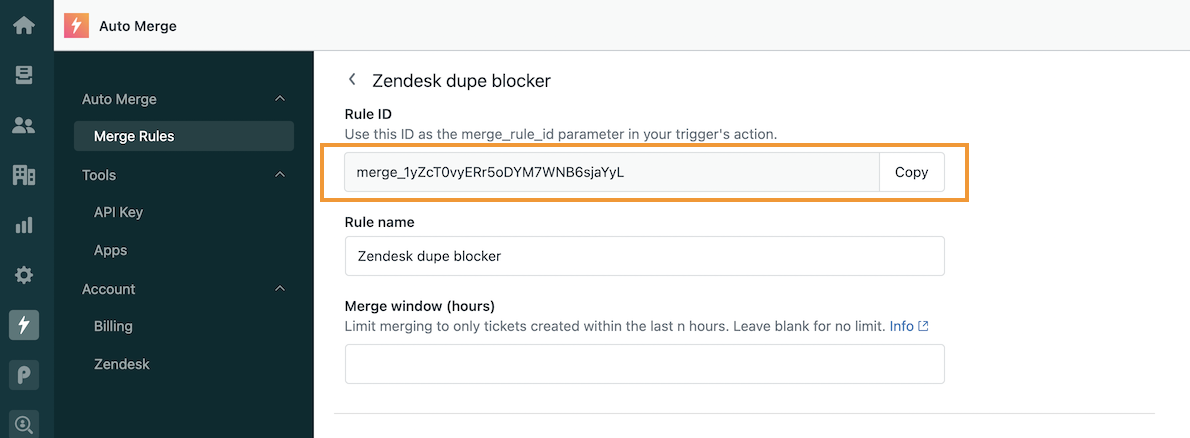
You can find Rule ID at the top of your rule's detail page.

Avoiding trigger loops
To avoid trigger loops, please ensure that you only notify the webhook once within the lifecycle of each ticket. Using the Ticket > Is > Created condition in your trigger (i.e. only firing the trigger when a ticket is created) is the easiest way to prevent trigger loops.