There are 3 steps to set up the Dedicated Support workflow:
- Generate Playlist API key
- Enable Dedicated Support
- Create trigger to notify active webhook
1. Generate Playlist API key
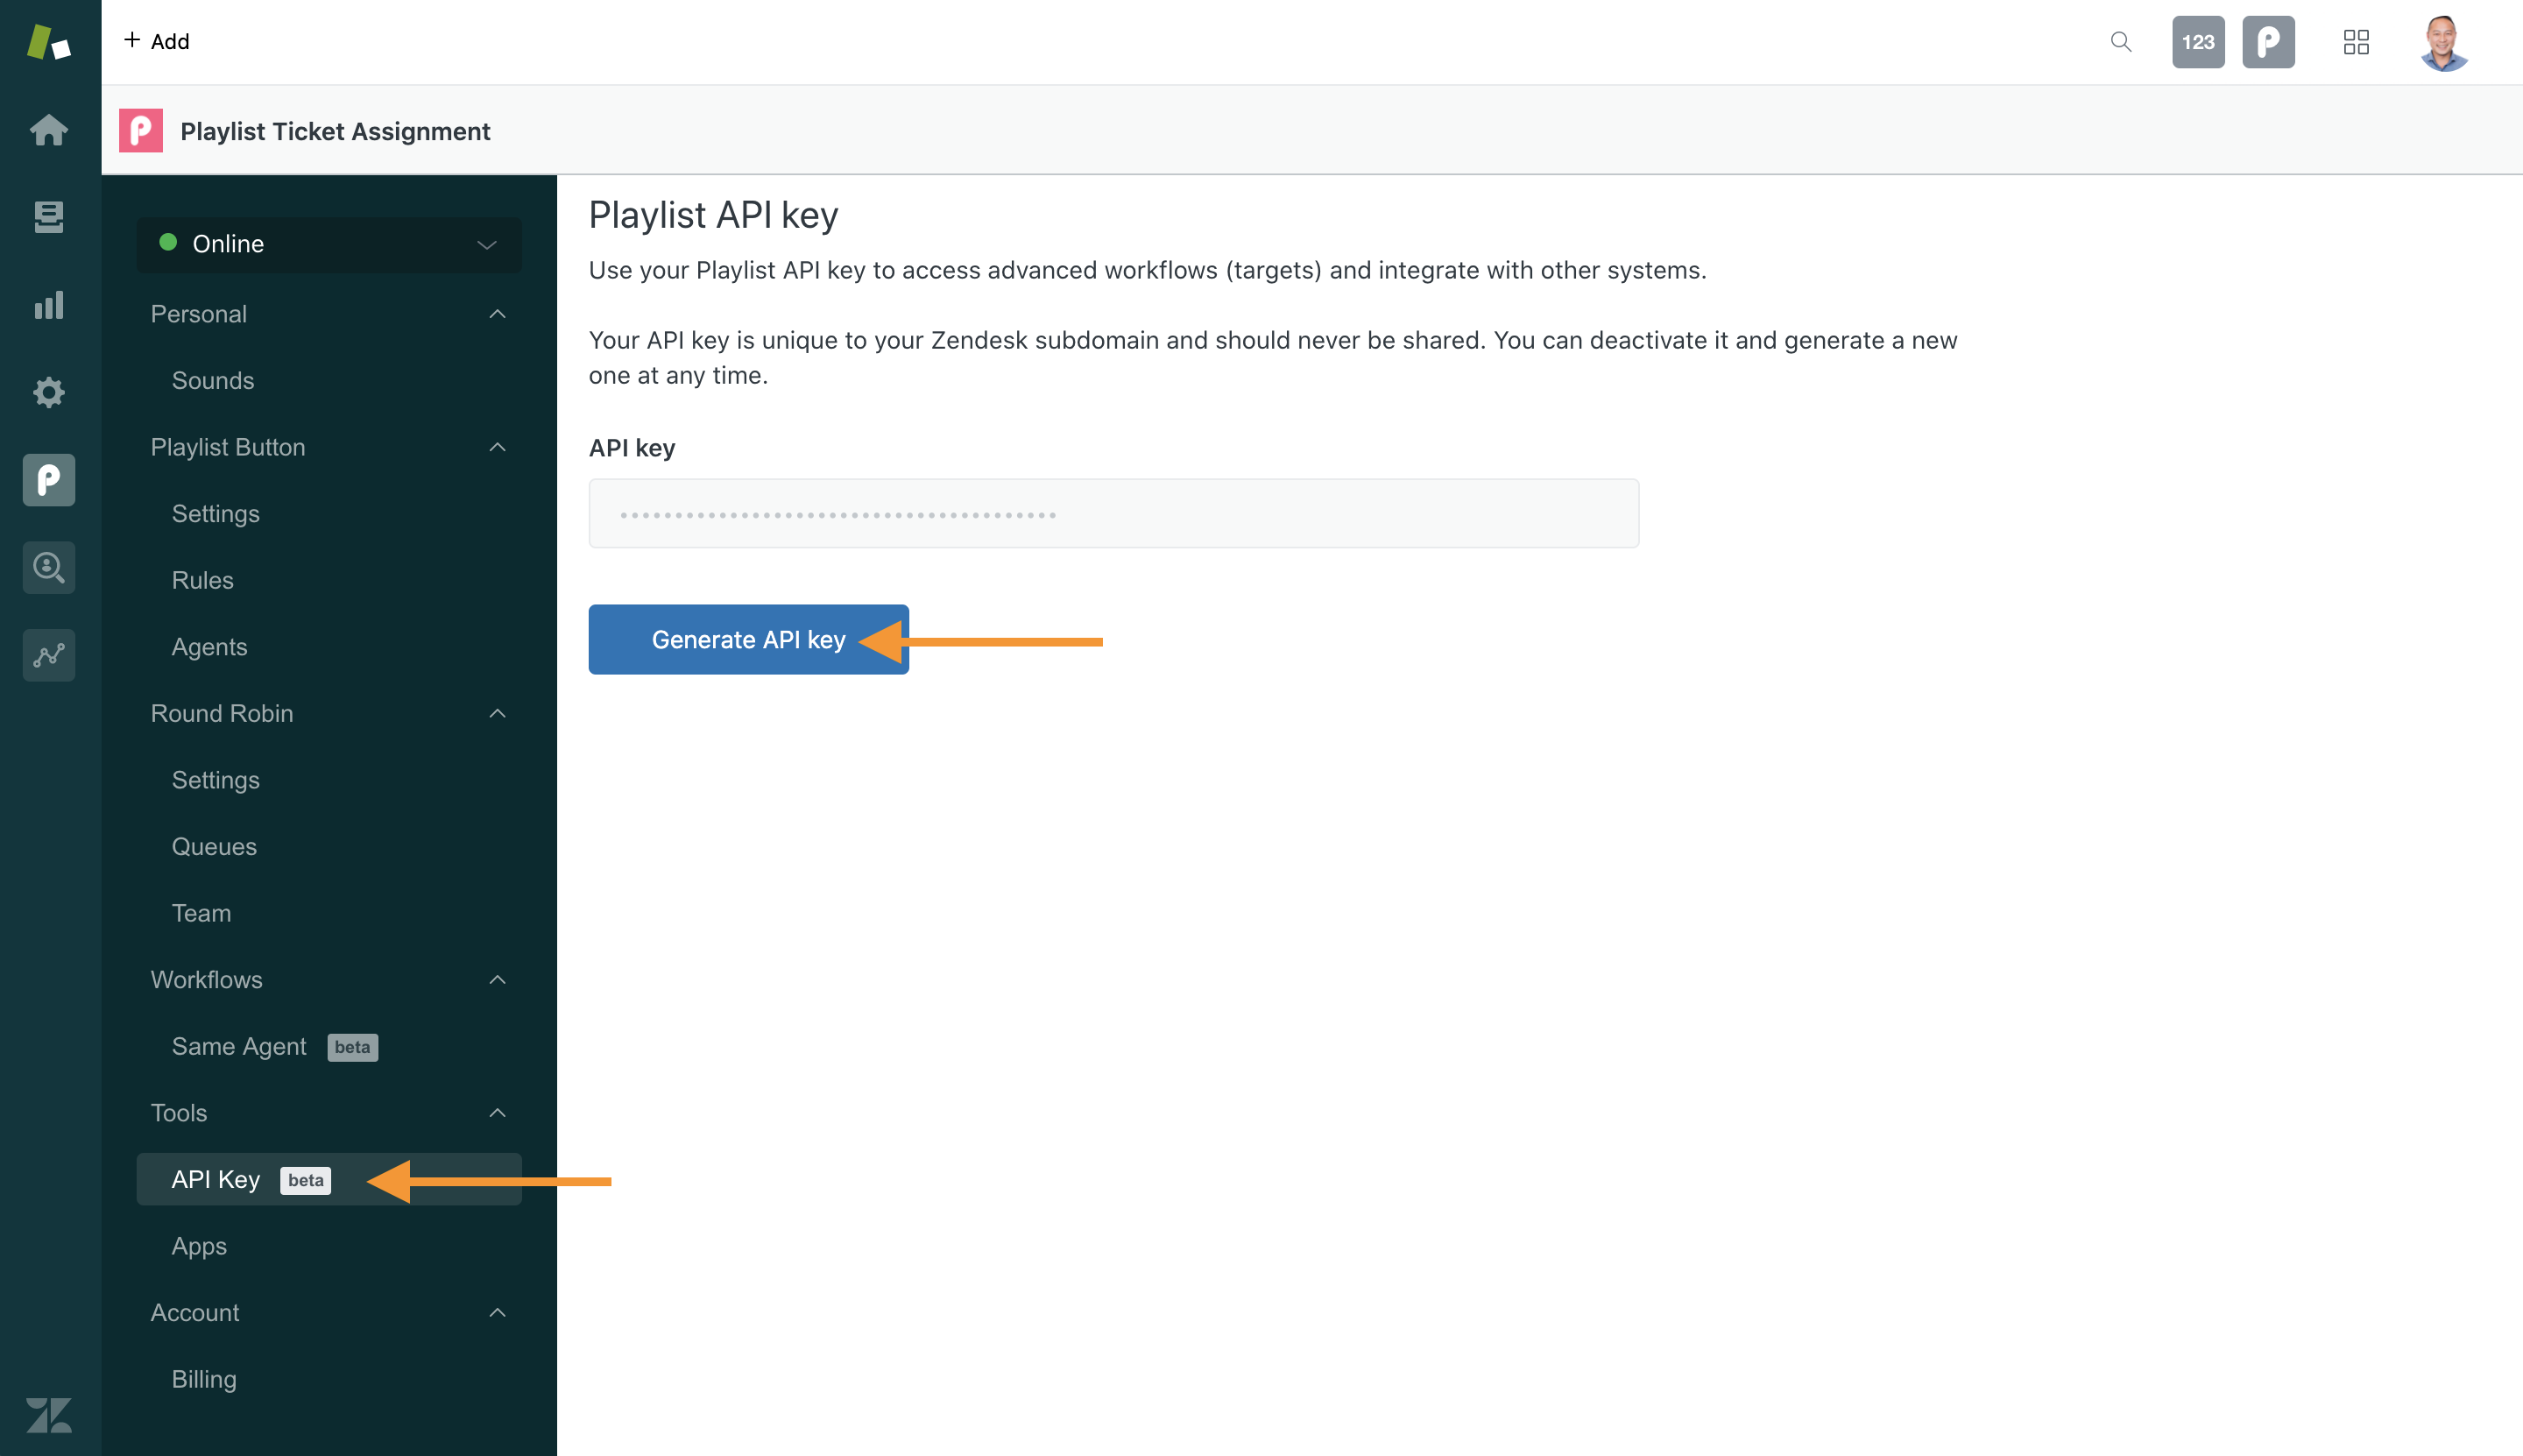
To enable the Dedicated Support workflow, you'll first need to generate your Playlist API key. Your API key is used to identify your account and should never be shared with the public.
Go to Playlist Setup > Tools > API Key
If you only see a "Deactivate" button, your account already has a Playlist API key. You can skip to the next step.
If you see a "Generate API key" button, click on it. Once the key is generated, copy it and store it somewhere secure for future usage.
You actually won't need to reference your API key for this process, but you may want to use it for future integrations (your workforce management software, internal tools, etc.).
2. Enable Dedicated Support
Go to Workflows > Dedicated Support. Click Enabled.
When you enable Dedicated Support for the first time, a Playlist Dedicated Support Webhook is automatically created for you. This webhook will be used by your trigger in the next step.
Once enabled, you can adjust settings to your team's preferences.
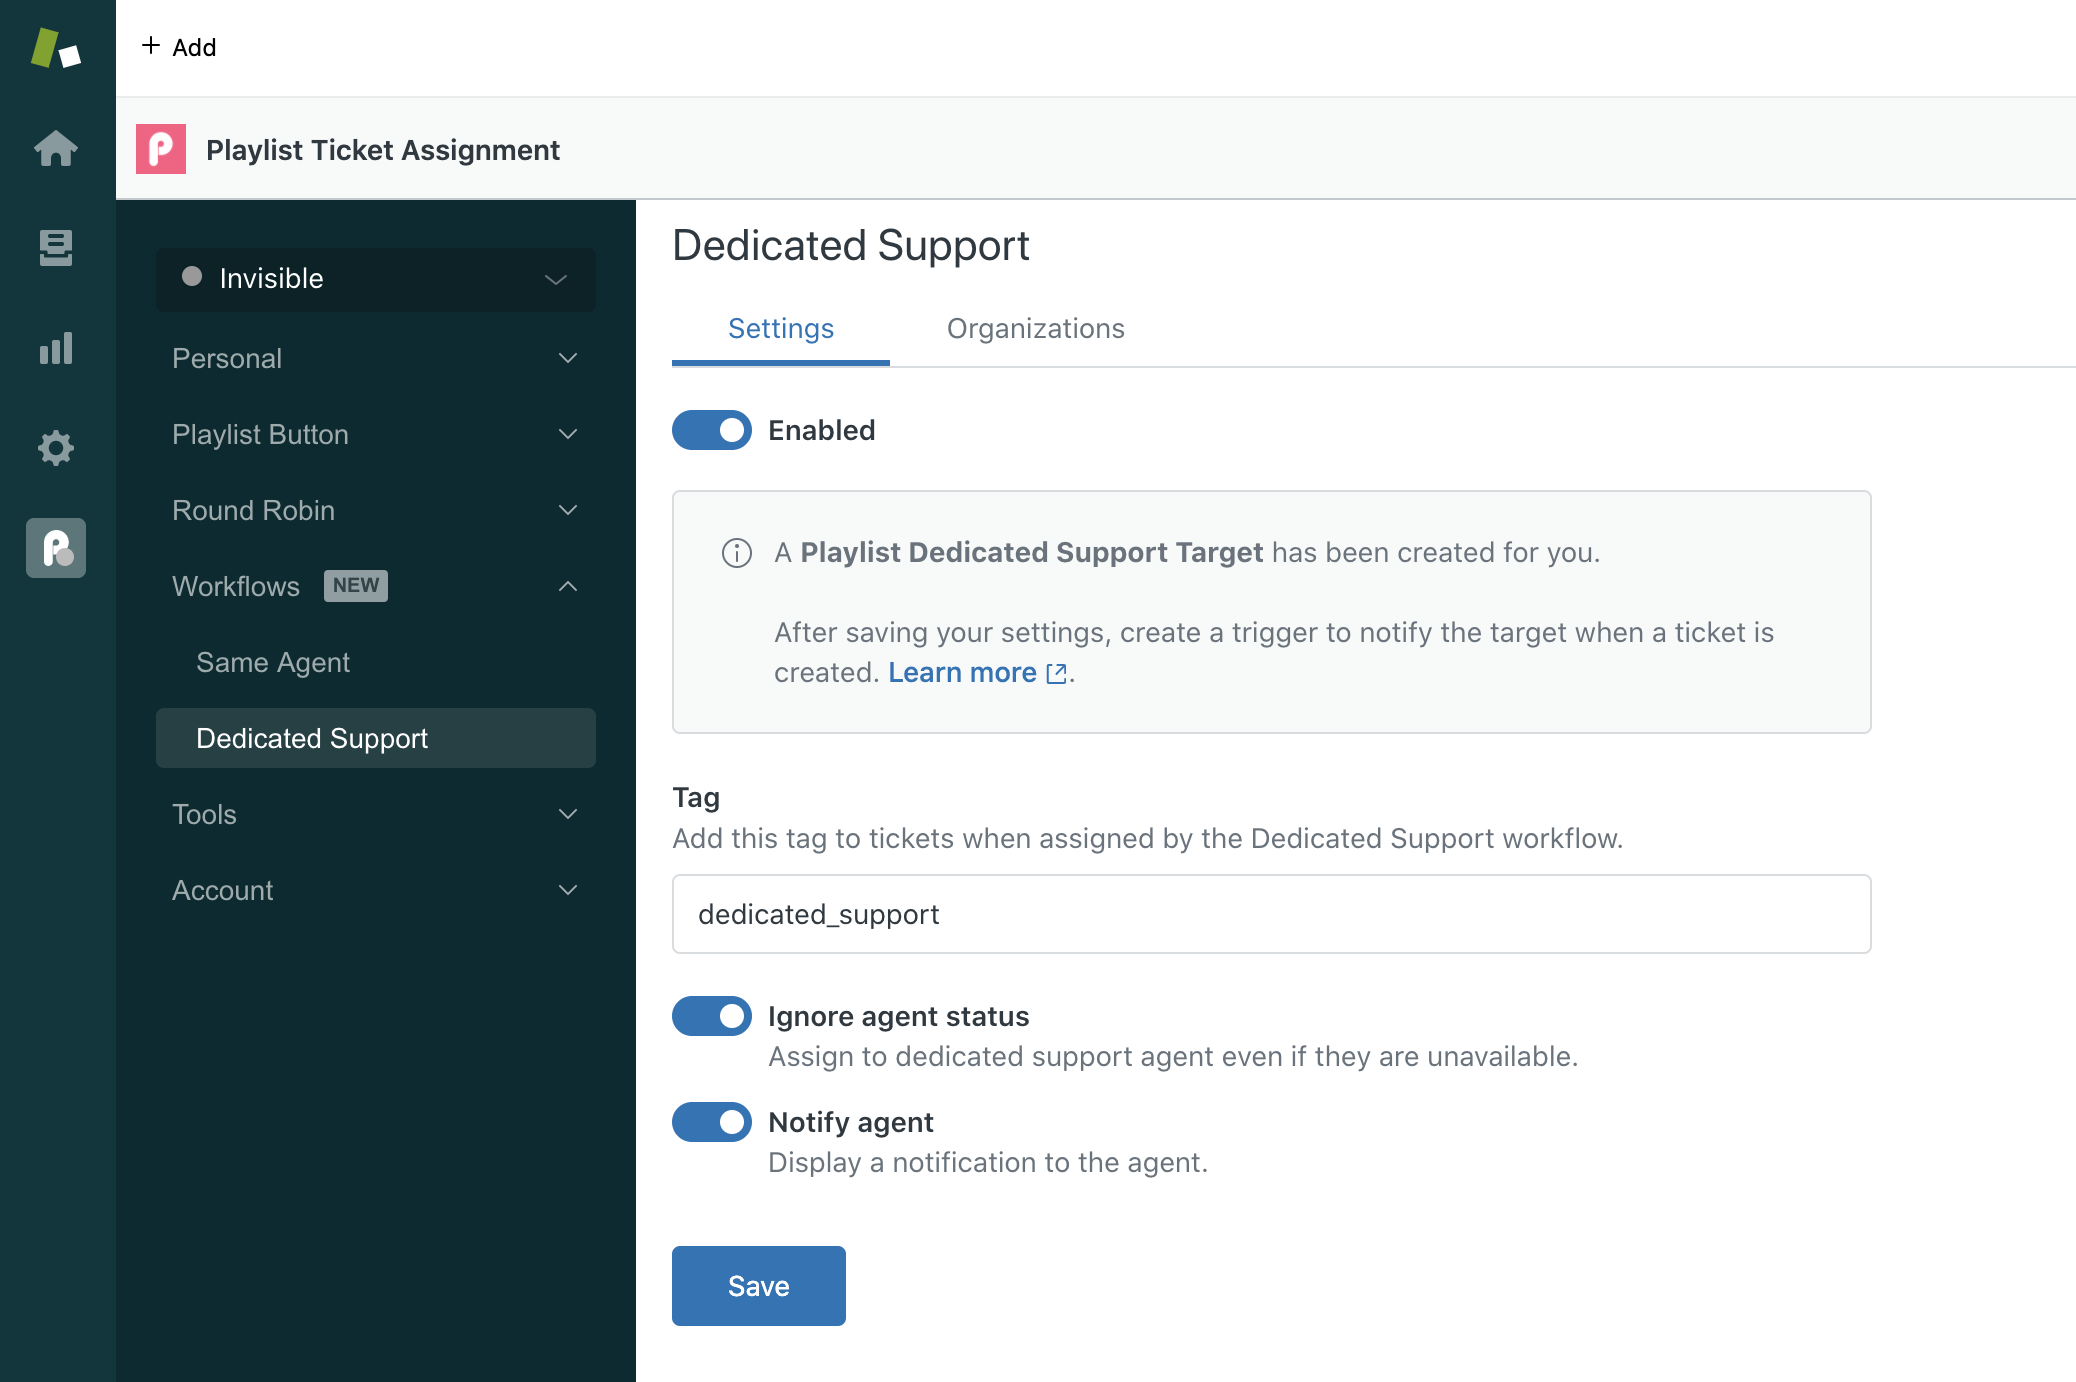
Tag
Optionally, tag tickets that are successfully assigned by the Dedicated Agent workflow. The tag may be useful for reporting, or you may want to leverage it for other triggers and automations.
Ignore agent status
Enabled by default. If disabled, the ticket will only be assigned to the dedicated agent if they are set to Online in Playlist.
Notify Agent
Enabled by default. This will display a notification to the agent when the ticket is assigned to them via the same agent workflow. It's the same notification you'd expect from the Playlist Button or Round Robin for new tickets. If the agent has selected a sound in their personal settings, they will also hear the sound.
3. Create trigger to notify active webhook
Create a trigger to notify the Playlist Dedicated Support Webhook. This will send a message to our server whenever a new ticket is created and the [Playlist] Dedicated Agent ID field is present. Our server will use this information to automatically assign the ticket.
Sample trigger
Here's a suggested trigger to help you get started. Of course, you'll want to customize it to fit your needs. Only the parts in blue are required.
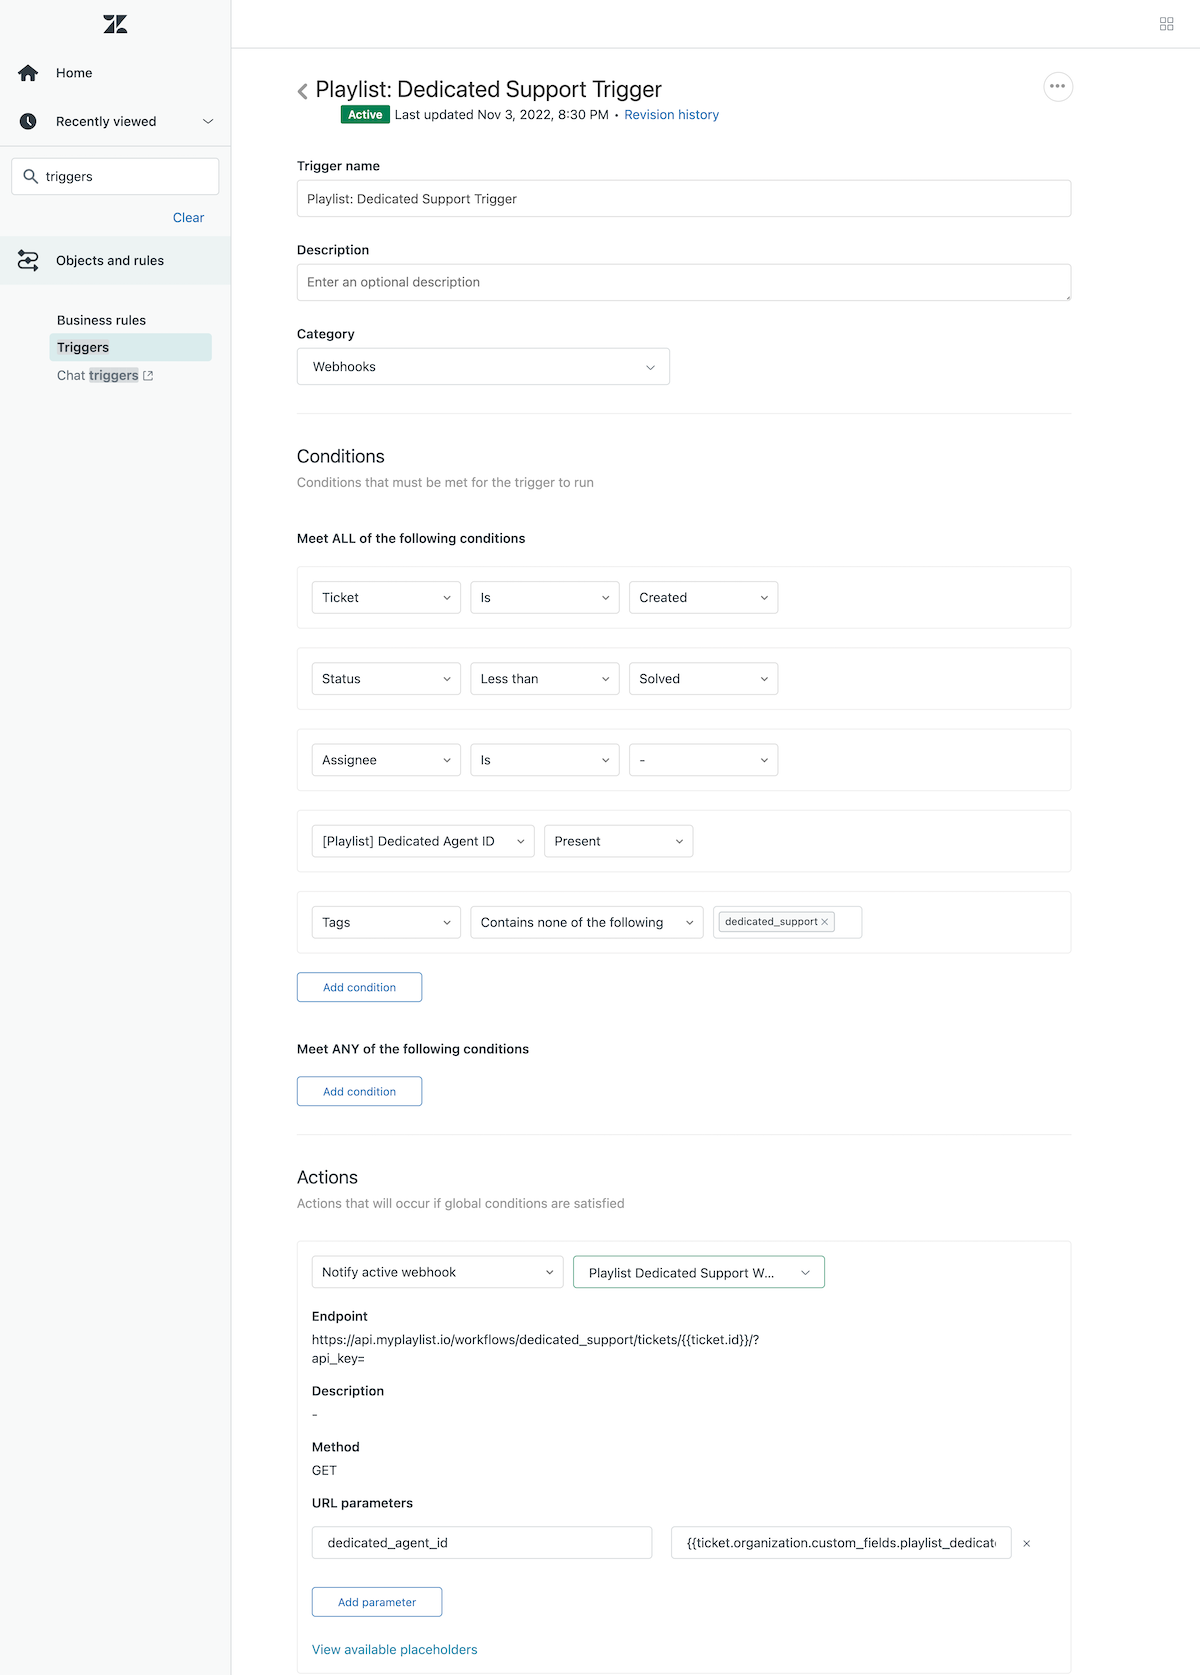
Zendesk Admin > Triggers > Add trigger.
Trigger name: Playlist Dedicated Support Trigger
Conditions (Meet ALL):
- Ticket > Is > Created
- Status > Less than > Solved
- Assignee > Is > -
- [Playlist] Dedicated Agent ID > Present
- Tags > Contains none of the following > dedicated_support (or your tag from step 2)
Actions:
- Notify active webhook > Playlist Dedicated Support Webhook
- URL parameters
- key: dedicated_agent_id
- value: {{ticket.organization.custom_fields.playlist_dedicated_agent_id}}
Avoiding trigger loops
To avoid trigger loops, please ensure that you only notify the webhook once within the lifecycle of each ticket. Using the Ticket > Is > Created condition in your trigger (i.e. only firing the trigger when a ticket is created) is the easiest way to prevent trigger loops.
Additional notes
- Tickets that are closed or already assigned to another agent will be ignored
- A ticket will only be assigned by the Dedicated Support workflow once