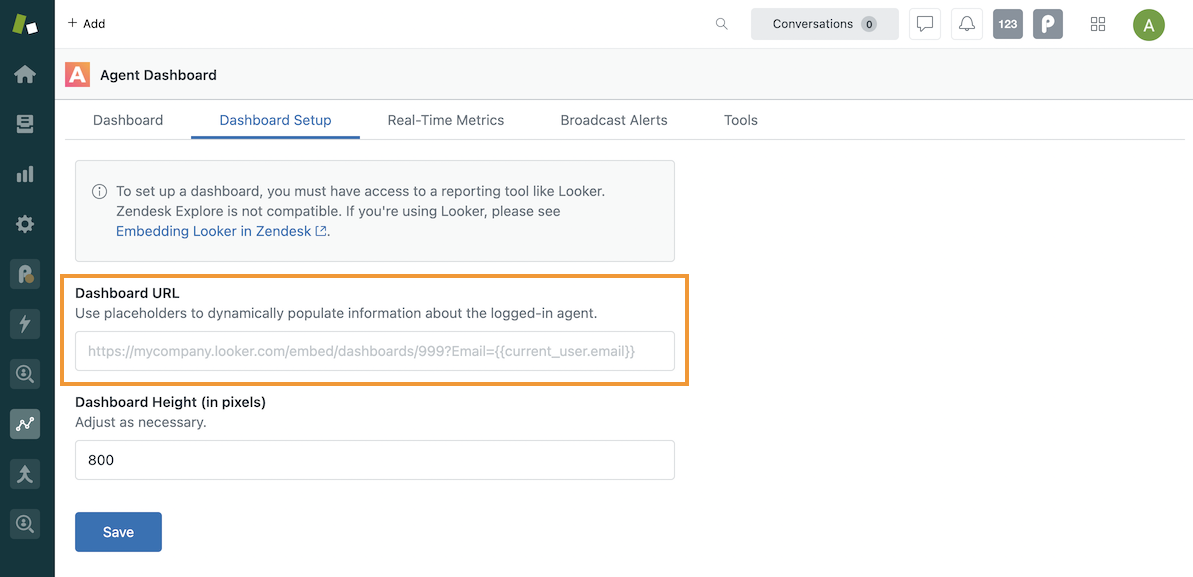
The Dashboard URL setting specifies the dashboard that should be embedded in Zendesk. To construct the appropriate Dashboard URL, you'll have to convert your Looker dashboard's URL to an embed URL. Otherwise, you'll get a "...refused to connect" error.
Instructions
1. Open a saved dashboard in Looker.
2. Copy the URL.
3. For a dashboard that uses the new dashboard experience, change /dashboards-next/ to /embed/dashboards-next/ in the URL. For a legacy dashboard, change /dashboards/ to /embed/dashboards/ in the URL.
For example, this:
https://instance_name.looker.com/dashboards/1
changes to:
https://instance_name.looker.com/embed/dashboards/1
See Looker's article for more information on embedding dashboards.
4. Incorporate placeholders to dynamically filter based on the logged-in agent (current user).
Example
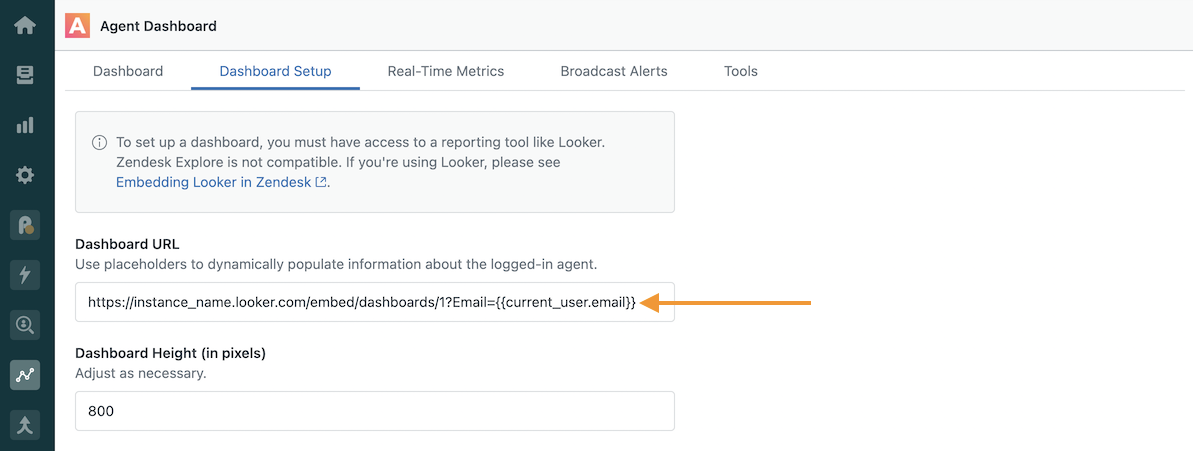
If your dashboard uses an Email filter, append ?Email={{current_user.email}} to the end of the URL. Please note that the names of filters in Looker are case sensitive.
Your final URL should look something like this:
https://instance_name.looker.com/embed/dashboards/1?Email={{current_user.email}}
5. Copy your final URL and paste it into the Dashboard URL setting in Agent Dashboard. Save.
6. Refresh the page and open up a ticket to test out the embedded dashboard.